
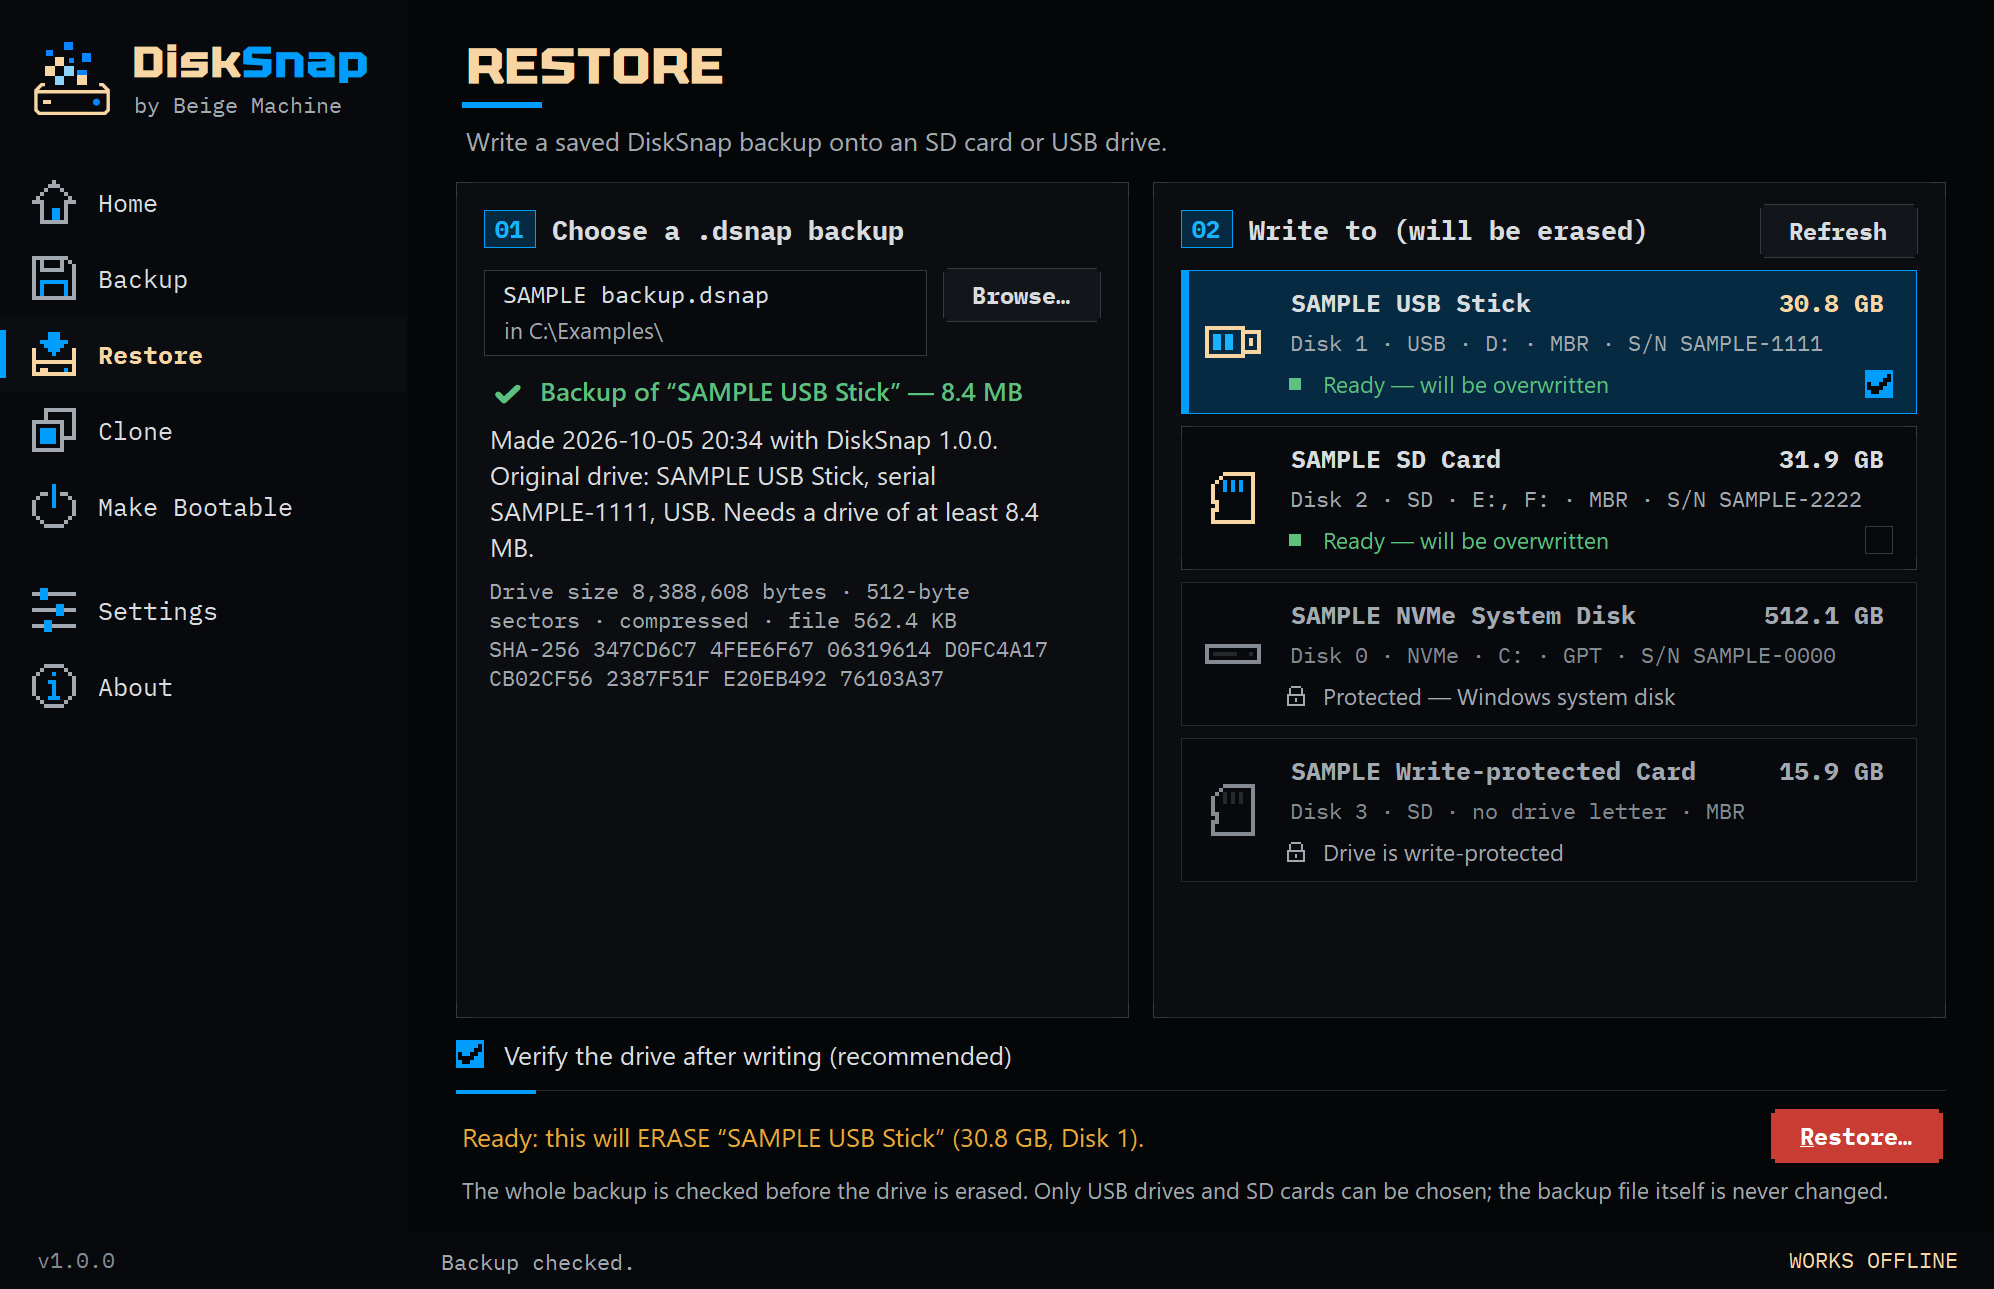
Restoring writes a DiskSnap backup (a .dsnap file) back onto a USB stick or SD card. Afterwards the drive holds exactly what the original held when you backed it up: the same partitions, files and boot setup. You can restore onto the original drive, or onto a different one, as many times as you like.
Restore erases the drive you restore onto
Everything on it (every file and every partition) is replaced by the backup. Make sure it holds nothing you need. If you’re not sure, back it up first.
What you’ll need
- A Windows PC with DiskSnap on it, and an account that can approve an administrator prompt.
- Your
.dsnapbackup file, somewhere on your PC. - A USB stick or SD card at least as large as the drive the backup came from. It will be erased.
Before you start
| Item | What happens to it |
|---|---|
The .dsnap backup file | Read only. It’s never changed, so you can restore it again later. |
| The drive you restore onto | Erased and overwritten with the backup. |
| Your PC’s own drive | Not touched. Internal drives and the Windows drive are locked. |
How big does the drive need to be?
At least as big as the original drive, not the backup file. A backup of a 16 GB stick needs a 16 GB drive or bigger, even if the file itself is much smaller. Watch out for sticks sold with the same label: two “16 GB” sticks from different makers can differ slightly, and if the new one is even a little smaller, DiskSnap locks it as Too small for this backup. Restoring to a smaller drive isn’t supported yet.
Both drives must also use the same sector size, which is true of almost every USB stick and SD card. If they don’t match, DiskSnap refuses before erasing anything.
Unplug any other USB drives and SD cards, so the drive you mean to erase is the only one you could pick.
Restore the backup
- Plug in the drive to restore onto and open DiskSnap.
- Click Restore in the menu on the left.
- Choose your backup under 1 · Choose a DiskSnap backup (.dsnap) with Browse…. DiskSnap checks it and shows where it came from: the original drive’s name and serial number, when it was made, and the smallest drive it needs. If the file is damaged or isn’t a DiskSnap backup, it says so and won’t go any further.
- Choose the drive under 2 · Choose the drive to restore to (it will be erased). Drives that can’t be used are locked, with the reason: your Windows drive, a drive that’s too small, or the drive the backup file is stored on.
- Leave Verify the drive after writing (recommended) ticked.
- Click Restore… The first time, DiskSnap explains that restoring needs administrator rights and offers to restart. Say yes and accept the Windows prompt. DiskSnap reopens with the backup still selected. Choose the drive again and click Restore… once more.
- Check the confirmation box carefully. It shows the target drive’s name, size, disk number, drive letters and serial number, plus which backup you’re restoring and where it came from. It also tells you if you’re restoring onto a different drive from the original, or onto a larger one. If it’s right, tick I have checked this is the correct drive…, type ERASE, and click Restore.
- Wait. The progress window shows each stage and how far along it is. Leave the drive plugged in until it finishes.
What DiskSnap does while it works
- Checks the whole backup first. Every piece of the file is read and checked before the drive is touched. If anything is wrong with the backup, it stops there, and your drive is left exactly as it was.
- Checks the drive again. It confirms the drive is still the one you chose, is a USB stick or SD card, and isn’t your Windows drive.
- Prepares the drive. It locks the drive so nothing else can use it, and clears its old partition table.
- Writes the backup onto the drive.
- Verifies it (if Verify is on) by reading the drive back and checking it against the fingerprint recorded when the backup was made.
How to know it worked
The progress window ends with Complete and Verify: passed — the drive matches the backup. The summary shows the SHA-256 fingerprint of what was written, which is the fingerprint recorded when the original drive was backed up. Matching fingerprints mean the drive holds exactly what the original held.
Windows wants to format the drive? Click Cancel.
If the backup came from a Linux, Raspberry Pi or other non-Windows drive, Windows may offer to format partitions it can’t read. The drive is fine. Formatting would erase what you just restored.
Good to know
- Restoring onto a bigger drive works. The backup fills the start of the drive, and its partitions keep their original sizes, so the extra space is left unused until you do something with it. DiskSnap doesn’t wipe that extra space. It does clear the very end of the drive (the last 1 MiB) while preparing it, and none of the drive’s old files can be reached afterwards. Treat everything that was on the drive as gone, but don’t treat the leftover space as securely wiped either.
- Tiny change after the restore: if the backup came from a drive with a blank disk ID (common on cameras and single-board computers), Windows may stamp a new ID onto the restored drive once DiskSnap has finished with it. That changes four bytes at the very start of the drive and doesn’t affect the files on it.
- The backup file is never changed by restoring it.
Troubleshooting
The most common problems are below. For everything else, see DiskSnap Troubleshooting, organised by what you see.
“This file can’t be restored”
The backup is damaged, incomplete, or not a DiskSnap backup. The reason is shown underneath. Nothing has been erased. If you have another copy of the backup, try that.
The drive is locked as too small
Use a larger drive. See How big does the drive need to be?
You stopped it, or the drive was pulled out
If DiskSnap had already started preparing or writing the drive, it’s now incomplete and its old contents are gone. Restore it again, or format it in Windows to reuse it. The backup file isn’t affected.
Verification failed
Don’t use that drive. Try again in a different USB port. If it fails again, the drive is probably faulty. Your backup file is still fine.
Safety notes
- Restore replaces the whole drive.
- Check the serial number in the confirmation box, especially if you have two identical-looking sticks plugged in.
- Only USB sticks and SD cards can be chosen. Internal drives and the Windows drive are always locked.