
A DiskSnap backup takes a snapshot of an entire USB stick or SD card, not just the files you can see in File Explorer. It captures every partition, the partition table and the boot setup too. So a Raspberry Pi card, a Linux boot stick or a camera card can later be put back exactly as it was, and still work.
The backup is saved as one file ending in .dsnap. Keep it somewhere safe and you can restore it whenever you like, onto the same drive or a different one.
Backup only reads the drive
Nothing on the drive you’re backing up is changed. DiskSnap opens it read-only. The only thing written is the new backup file on your PC.
What you’ll need
- A Windows PC with DiskSnap on it, and an account that can approve an administrator prompt.
- The USB stick or SD card you want to back up (and a card reader, for an SD card).
- Free space for the backup file on a drive other than the one you’re backing up. Plan for up to the full size of the drive. Often it ends up much smaller (see below), but that depends on what’s on it.
What’s in a .dsnap file?
A .dsnap file is DiskSnap’s own backup format. It holds a complete copy of the drive from its first byte to its last, plus some details about where it came from: the drive’s name, serial number, size and when the backup was made. DiskSnap shows you these when you restore it.
A few things keep it tidy and trustworthy:
- Empty areas take almost no space. Stretches of the drive that are completely blank (all zeros) are just noted, not stored.
- Compression, if you leave it on, squeezes the rest wherever that makes it smaller.
- Everything is checksummed. Each piece carries its own check value, and the file records a SHA-256 fingerprint of the whole drive. That’s how DiskSnap can tell a good backup from a damaged one.
How big the file ends up depends on the drive’s contents. Note that “free space” in Windows isn’t always blank: deleted files often leave their old data behind, and that still gets backed up.
Before you start
- Close File Explorer windows showing the drive, and anything else using it (photo importers, for example). DiskSnap holds the drive still while it reads it, so nothing changes halfway through.
- Choose a save location on your PC’s own drive if you can. By default DiskSnap saves to a DiskSnap Backups folder in your user folder (outside Documents). If your Documents are synced to OneDrive or another cloud service, you may prefer another local folder, then copy the finished file wherever you like.
- Avoid saving to a FAT32 drive (common on older USB sticks). It can’t hold files over 4 GB. DiskSnap warns you if you pick one.
Make the backup
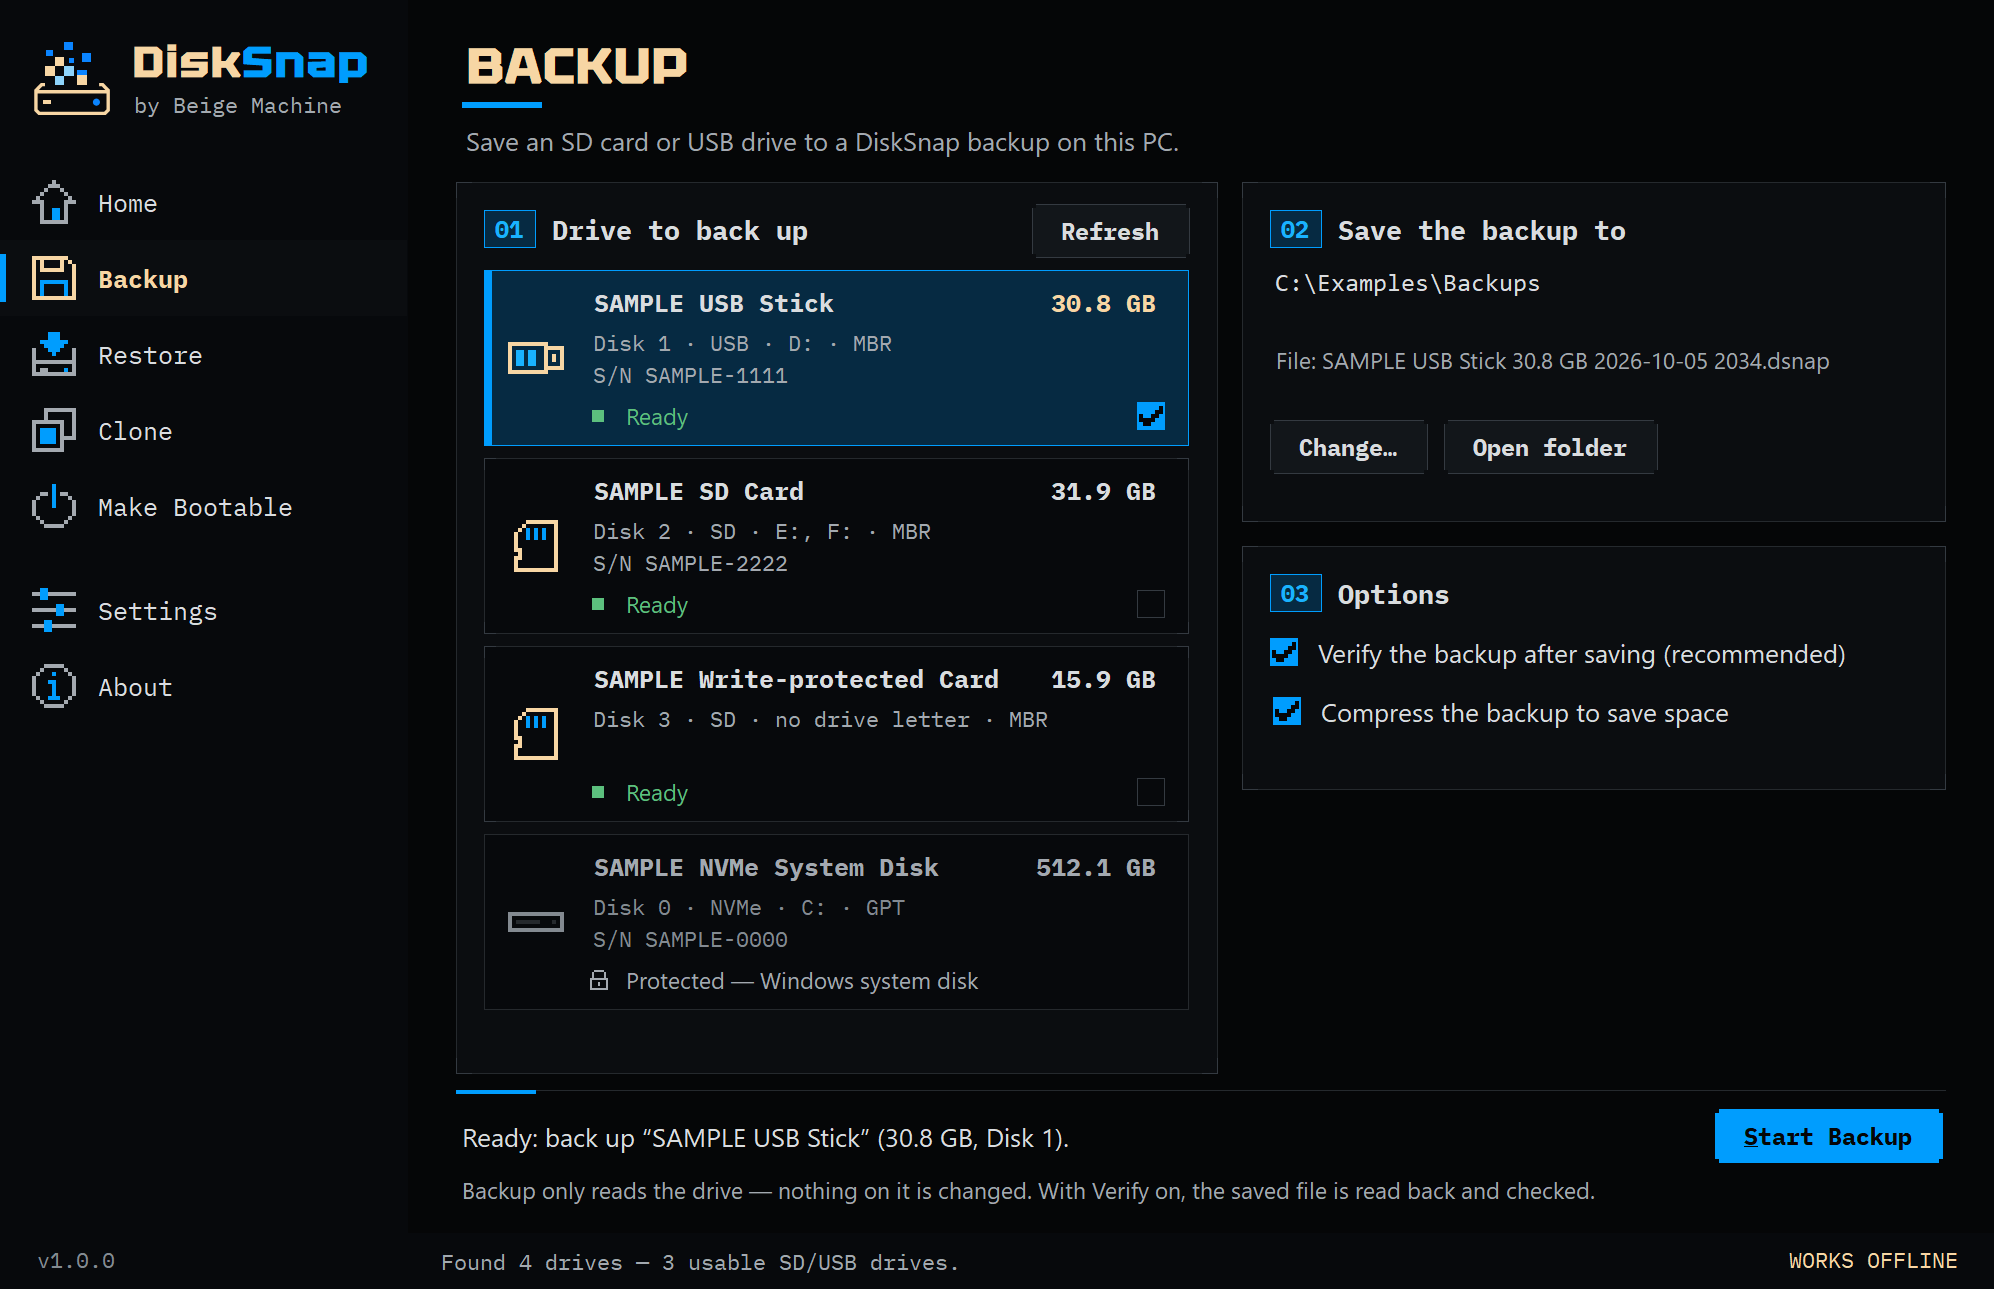
- Plug in the drive and open DiskSnap.
- Click Backup in the menu on the left.
- Choose the drive under Drive to back up. Your PC’s own drives are locked and can’t be chosen.
- Check the save folder under Save the backup to. Use Change… to pick another. DiskSnap names the file for you from the drive and the date and time, for example
USB Drive 32 GB YYYY-MM-DD HHMM.dsnap. - Leave both options ticked: Verify the backup after saving (recommended) and Compress the backup to save space.
- Click Start Backup. The first time, DiskSnap explains that reading a whole drive needs administrator rights and offers to restart. Say yes and accept the Windows prompt. DiskSnap reopens on the Backup page with your save folder kept. Choose the drive again and click Start Backup.
- Check the summary and click OK. It lists the drive, the file name, the folder, and any warnings, such as not enough free space.
- Wait. The progress window shows how much has been read and the speed. A full-size stick takes a while. Let it finish.
How to know it worked
The progress window ends with Complete and Verify: passed — the backup file is intact. The summary shows the drive size next to the backup file’s size, where it was saved, and the drive’s SHA-256 fingerprint.
Here’s what Verify checks, and what it doesn’t. It reads the finished backup file back from your PC, checks every piece, and checks the fingerprint of the whole thing. It doesn’t read the USB stick or SD card a second time. That’s enough to know the file on your PC is complete and undamaged.
DiskSnap writes the backup under a temporary name first. It only gets its real .dsnap name once everything has finished, so a half-made backup never looks like a real one.
Looking after your backup
- Keep a second copy of anything important somewhere else: another drive, or cloud storage once it’s finished. A backup on one PC is still only one copy.
- Don’t rename the extension. The file name itself can be anything you like, as long as it still ends in
.dsnap. - Everything stays on your PC. DiskSnap works offline and uploads nothing.
Troubleshooting
The most common problems are below. For everything else, see DiskSnap Troubleshooting, organised by what you see.
“Another program is using the drive”
Close File Explorer windows showing the drive, and anything that might be scanning or importing from it, then try again.
You stopped it, or it ran out of space
Nothing on the drive was changed, and the unfinished file is deleted. Free up space, or pick another folder, and start again.
A backup with the same name already exists
DiskSnap asks before replacing it. The old file is only replaced once the new backup has finished successfully. If you cancel, the old one is kept.
Verification failed
No backup is kept. Try again. If it keeps failing, check the drive you’re saving to: the problem is with writing or reading the file on your PC.
What next?
To put the backup back onto a drive, follow Restore a DiskSnap backup. Restoring needs a drive at least as large as the original, and it erases that drive.